Preparation
You have to follow some preparation steps for Galette installation. The way to go differs on what you want to achieve.
File permissions
Warning
A commonly used hack is to give all rights to everyone recursively on the directory (chmod 777). This is a very very bad idea from a security point of view. Please do not use that hack, you’ve been warned ;)
Some Galette directories need specific rights. The application will need to write in some of them, you have to ensure it will be possible. Here are directories that need a write access:
 config 1,
- data/attachments,
- data/cache,
- data/exports,
- data/files,
- data/imports,
- data/logs,
- data/photos,
- data/tempimages,
- data/templates_c
- 1
write access on
configdirectory is only needed for Galette installation, we advice you to remove the write access once Galette has been installed :)
Create database
Note
Never use database root user!
For security reasons, it is strongly advised to rely on a specific user for Galette database, and give him only requested access on the single Galette database.
For the example, we will use a database named mygalette with a user mygaletteuser with mypass as password.
MariaDB
$ mysql -u root -p
mysql> CREATE DATABASE mygalette;
mysql> GRANT ALL ON magalette.* to
    ->'mygaletteuser'@'localhost' IDENTIFIED BY 'mypass';
PostgreSQL
$ su -
# su - postgres
$ createuser -P mygaletteuser
$ createdb -O mygaletteuser mygalette
Those commands may vary, please refer to MariaDB or PostgreSQL documentations, or use a graphical tool:
phpMyAdmin for MariaDB ;
phpPgAdmin or PgAdmin for PostgreSQL.
Web server directory exposition
New in version 0.9.
Galette installation may consists in copying a complete directory to a location the web server can read. This method may work, but this exposes from the web files and directories that should not be available this way.
It is possible to limit that by exposing only the webroot directory. All other directories are more safe: it is not possible to reach them from the web server!
Warning
Exposing only webroot directory is the recommended, and only secured way.
Using a subdomain
Here is a virtual host configuration example, including the hide of index.php:
<VirtualHost *:80>
    ServerName galette.localhost

    #https - add *:443 in the <VirtualHost>
    #SSLEngine on
    #SSLProtocol all -SSLv2 -SSLv3
    #Header always add Strict-Transport-Security "max-age=15768000; includeSubDomains; preload"

    #SSLCertificateFile /etc/pki/tls/certs/galette.localhost.crt
    #SSLCertificateChainFile /etc/pki/tls/certs/galette.localhost.chain.crt
    #SSLCertificateKeyFile /etc/pki/tls/private/galette.localhost.key

    DocumentRoot /var/www/galette/galette/webroot/
    <Directory /var/www/galette/galette/webroot/>
        RewriteEngine On
        #You may need to set RewriteBase if you setup
        #rewritting in a .htaccess file for example.
        #RewriteBase /
        RewriteCond %{REQUEST_FILENAME} !-f
        RewriteRule ^(.*)$ index.php [QSA,L]
    </Directory>
</VirtualHost>
Nginx would be:
server {
    #http
    listen 80;
    listen [::]:80;

    # https
    #listen 443 ssl http2;
    #listen [::]:443 ssl http2;
    #ssl_certificate      /etc/ssl/certs/galette.localhost.pem;
    #ssl_certificate_key  /etc/ssl/private/galette.localhost.key;

    server_name galette.localhost;

    root /var/www/galette/galette/webroot;

    index index.html index.php;

    location / {
        try_files $uri $uri/ @galette;
    }

    location @galette {
        rewrite ^(.*)$ /index.php last;
    }

    location ~ \.php$ {
        include snippets/fastcgi-php.conf;
        # You may have to adapt this path, depending on your distribution.
        fastcgi_pass unix:/var/run/php7.0-fpm.sock;
    }

    location ~ /(data|config|lib)/ {
        deny all;
    }
}
Using an alias
An alternative secured configuration, if you do not have a specific subdomain for Galette is to use an alias in your existing virtual host:
<VirtualHost *:80>
    ServerName mydomain.tld

    DocumentRoot /var/www/mydomain.tld

    Alias /mygalette/ /var/www/galette/galette/webroot/
    <Directory /var/www/galette/galette/webroot/>
        RewriteEngine On
        #You need to set RewriteBase to Alias path
        RewriteBase /mygalette/
        RewriteCond %{REQUEST_FILENAME} !-f
        RewriteRule ^(.*)$ index.php [QSA,L]
    </Directory>
</VirtualHost>
Do not forget with that solution you have to setup correctly your RewriteBase directive.
Linux/Unix
Installing Galette on Linux implies you have an access to the terminal on the server and required ACLs on directories.
As an example, on Fedora, you will run (as root):
# cd /var/www/galette/
# chown -R apache:apache config data
Under Debian, we’ll replace apache:apache with www-data:www-data.
On SELinux enabled systems, we’ll also add:
# semanage fcontext -a -t httpd_sys_rw_content_t '/var/www/html/galette/config(/.*)?'
# semanage fcontext -a -t httpd_sys_rw_content_t '/var/www/html/galette/data(/.*)?'
# restorecon -R -v /var/www/html/galette/
You will also have to authorize webserver to connect to the network, with a SELinux boolean:
# setsebool httpd_can_network_connect on
FTP
Warning
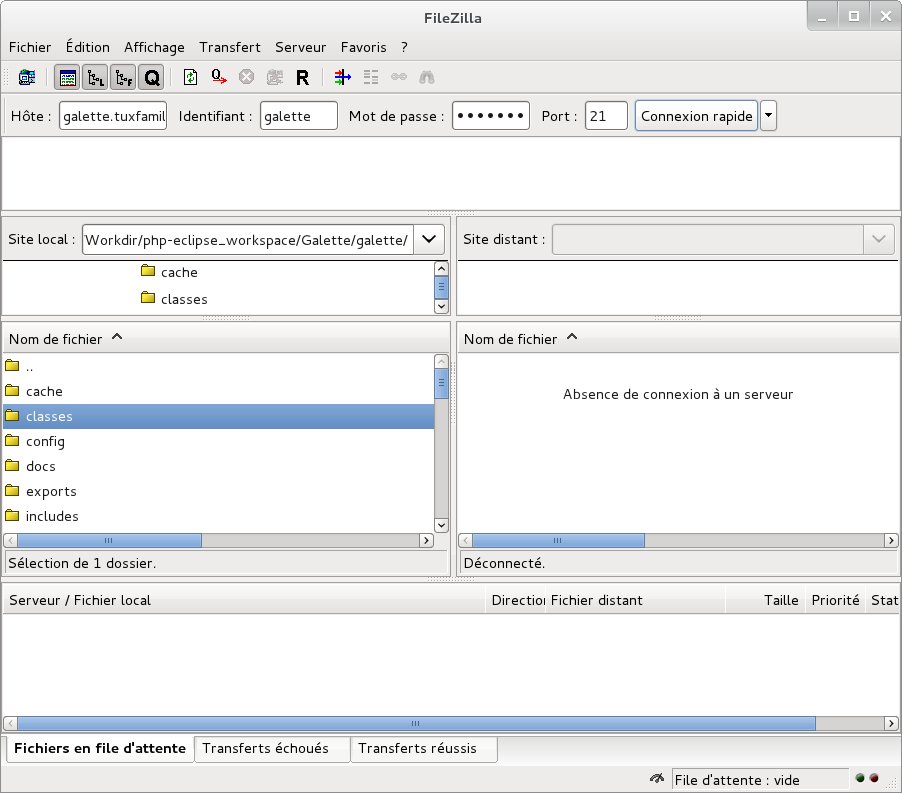
Some archive or FTP softwares may corrupt files… It is strongly advised if you use windows that you use 7zip to uncompress and FileZilla for TFP transferts.
Once source code has been retrieved locally, use tar xjvf galette.tar.bz2 command under Linux/Unix/MacOS or a graphical tool under Windows.
Just copy the uncompressed directory obtained, and all its sub directories and files, with your FTP client.
Specific cases
Ionos
If you’re hosted on Ionos; and want to use a specific subdomain for Galette, you must create your subdomain from their UI, and make it points to the webroot directory. You also have to edit the .htaccess file it contains, and uncomment the RewriteBase / directive.
OVH
This hosting company offers to change PHP version you use from your customer account.
Additionnal information are available at: https://docs.ovh.com/fr/fr/web/hosting/configurer-le-php-sur-son-hebergement-web-mutu-2014/
Warning
Many users have display images or attendance sheet issues on OVH hosts. The solution to this issue is to create a .ovhconfig file at your hosting root with the following contents:
app.engine=phpcgi
Nginx
Nginx webserver configuration is different from Apache one (see Nginx documentation for a more complete explanation).
So you have to convert restriction access files in Nginx configuration, as for example:
location ~ /(data|config|lib)/ {
    deny all;
}
Windows
Installation described here rely on XAMPP; other installation methods exist but are not listed here.
First of all, download XAMPP on your computer. Let’s install it under C:\xampp.
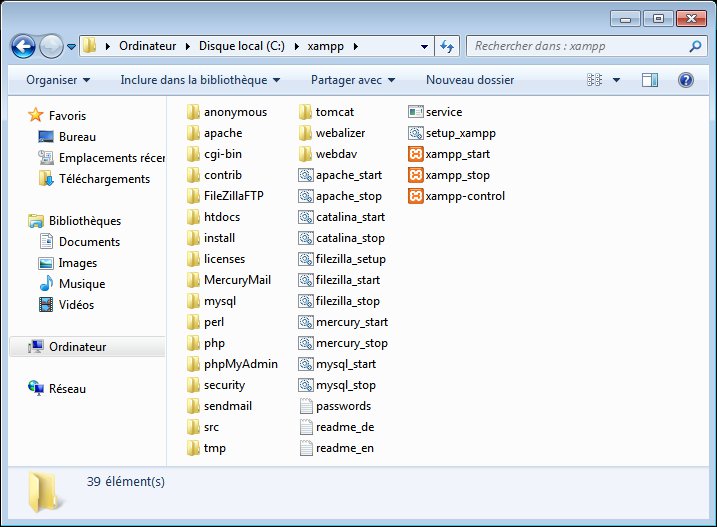
Launch the xampp-control executable (you can find it in C:\xampp), so you can start Apache and MySQL services.

Once those steps done, download galette and move it to C:\wampp\htdocs\galette, web application will be available from http://127.0.0.1/galette/. Just visit this URL so the installation process begin.
Note
Enabling PHP modules under XAMPP is done in xampp/php/php.ini. Most of the required extensions are already present, but commented (line begins with a “;”), just uncomment them and restart XAMPP.
openssl extension is missing in the file, to activate it just add the following to your php.ini: extension=php_openssl.dll